
Today, I wanted to go in to some basic geometry stuff! First, lets picture an image on a graph, like this.
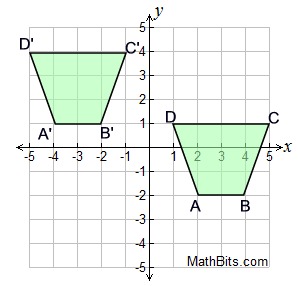
Take a look at the shape on the right. As a quick side note, when you are performing translations, the shape should never move. Think of a translation as sliding a piece of paper across a table, usually that shape stays the same direction it is. Notice how there are 4 points on the shape above (still looking at the shape on the right), A, B, C, and D? When you have to do a translation with a shape, all four of those points have to move, because the image needs to stay the same. So say I wanted you to move the shape to the left 6 points, and up 3 points. You would now have moved the shape to a different part of the graph. If you look at the left image, that would be where you moved the image to.
When you perform a translation, you should always label the points on the new image. The points should have the same letters, and they should be in the same place. One thing to note however, is when labeling the points on the new shape, you need to make them "prime". This is a fun way of saying that it is not the original shape, and that this is a new creation. See how there are little lines after the letters on the shape on the left? That is how you can tell the original image apart from the new image you have just created. You can do this for any image, not just this one!
I hope you've learned something new today!
Images From: https://mathbitsnotebook.com/Geometry/Transformations/TRTranslationsPractice.html
No comments:
Post a Comment